This is a photo album of my RV - 4.

I will be putting notes and explanatory pictures as I build this air plane.

E - Mail Me

Wednesday, October 8, 2014

Bad day in the workshop.

First sight of the flames. I had smelt the smoke and my pager went off with the message "Stay and defend or leave now" about ten minute ago.
This is not looking good.

Time to bug out but where to go? I am the last house on the street - after me only bush - don't even think about trying to scoot across the creek bed, lush and green as it may seem. I had already burned off a safe patch at the front of the house. The Hail Mary option. I had my PPE from the Volunteer Bushfire Brigade. I knew what the expressions "Being caught in the open, in a burn over, by yourself" and "Dead Man's Zone" meant from my training. The mantra is "Out of the green into the Black". I just keep repeating it.

I watched my house and my Old Gal VH-LAG vaporise then it was time to make a move myself.  The transition through the fire zone was a bit surreal, it started to hurt quite a bit but I kept moving. I made it out OK and got picked up off the side of the road, a sorry smoky soggy pile. Evacuated in one of our light tankers and got treated for minor burns and shock.


Thought that was the end of it but it wasn't. Once the fight and the adrenaline go out of your body and your conscious mind, there is more to come. It takes your subconscious about a fortnight to call a special AGM in the middle of the night to demand an answer from the committee  "What the Hell just happened ?? You nearly got me killed!!" From there on in relations degenerate and it becomes impossible to make decisions without murmurings of distrust from the rank and file general membership. People - Stress Depression - if / when you’re blood stream feels like it is comprised of microscopic razor blades. Pop a flare!! It can be lethal in it's self. Don't feel you are being weak or self indulgent - the process isn't working at a level accessible to reason, or even consciousness.

Like fires, PTSD modes, can happen quite fast so you don’t have time to muck around.

Call "Time Out" and head off to Canada. Spend some time with family (or strangers - when you get there you wont be able to tell the difference) and choose a Stetson. "You call those Mountains "Rocky" ? That's just sandstone! In Western Australia ...." Chill and Heal.

So what have we learned from this? Have a Bushfire Preparedness Plan. Go see the guys at your local Volunteer Bushfire Brigade and they will set you up.  Have a Stress Breakdown Plan for members of your family and close friends.

Thursday, November 28, 2013

Painting


The last photo is the only one that depicts colour accurately. The rest look like beige. It is actually a fine metalic light grey with a low gloss.  It looks 30's aviation "Old Skool" and I am happy as can be.

I used Dupont 2K and super etch primer.


Quantities

On the forum a poster says the RV-8 is 310 ftsquared. I used a 5 litre tin.

UPDATE: I had some touchups to do on the wing tips and wheel fairings. The paint appeared as good as new. Seems to be going off OK. Nearly exactly two years since the buy by date. Dunno what the specs are. I am just about getting the hang of painting now.

Saturday, February 2, 2013

Exhaust

Whilst the Vettermans is a breeze to install there are a few pointers.

http://www.eaavideo.org/video.aspx?v=57449257001

Sunday, January 27, 2013

Looks like an airplane.

Putting the prop cowls and wheel pants on looks speccy. There are still plenty of little details that need sorting out yet.


Saturday, January 26, 2013

To Do / To Buy

Elevator trim cable is too short.
Setup elevator end stops. Manual is not very clear on this.
Alternator / Generator Drill Mounting bracket.
Cabin Heat Muff ?
Cabin Air Vent
Pump for Brake Bleed.
Stall Warning Sender / Lamp
Angle Drill
Watyl Primer
Washers Engine Mount Upper


$ :
1 x ICOM 210A
1 x Stud on starter
2 x 3/16 bore 3.8 HEIM 3614M Rod End - Aileron Push Rod
1 x VA111 Threaded Rod End - Aileron Push Rod
1 x Nut on Exhaust Clamp - not nylock
 4 x Washers Engine Mount Upper
2 x Rudder Cables - lifed out - F-452-LX166
1 x Clevis End - Elevator Trim            
1 x PPT Switch
1 x Push Rod - same thread as AN3 - Rear Throttle
1 x 2 inch hose clamp / Carby Heat Muff.
1 x 44 inch Hinge Canopy Rail
Tacho Cable firewall fairlead


Spar Bolts:
14 x NAS 1306-30
2 x NAS 1306-32
2 x NAS 1304-30
2 x NAS 1304-32
16 x AN4-17A
12 x AN4-16A
1 x Fuel Cap
2 x O rings spares
2 x Fuel Qty Sender

Steam Guages / Oil Pressure Port

This caused a fair bit of angst. 


By the time I had identified the oil pressure port I had already put the engine mounts/Lord Mounts / engine on the firewall. The oil pressure takeoff is in a bastard spot just under the top engine mount and it is seized.  You cant install an oil pressure fitting in that place without removing the engine anyway. You need a 45° fitting there and you can't install a 90° because of interference with the engine block. Heat from a blowtorch gently applied is the go for loosening the plug.  I used a butane torch till the paint scorched and smoked it took some  torque but cracked ok.

You then need to tap the port since the NPT taper thread will only do up a few turns. Finish with a non hardening Loctite 567 type sealer. 

Reinstalling the engine is a real chore unless you hang the engine from the block and tackle and put the fuselage straight and level. It will either fight like hell or go straight on. Be pateint and get the job lined up right.

37 degree / spherical insert ?

I have a Fuel and Oil Pressure Gauge. I want to plumb them using a 37 degree flared fitting. They have a concave seal in the back of the guage male fitting.

I was thinking about spinning up a male 37 degree / spherical brass insert and running a hole through the middle on my mates lathe but it seems extraordinary and fiddly operation.

Is there a better way of doing this ?


Wednesday, January 23, 2013

RV-4 Fuel Pump Overflow Fitting

RV-4 Fuel Pump Overflow Fitting. Even though I bought the special fuel pump overflow fitting that Van's sells, I had no clearance between the fitting and the firewall.  I hit the firewall with an angle grinder and gain 1/4 inch strong clearance without causing damage to the underlying brackets.

Tuesday, January 22, 2013

Gascolator - where to mount it?


Empenage

When I fitted my HS I found that the inboard edges interfered with the fuselage when it was bolted on. Had I allowed 1/4 inch extra they would have been fine. As it is I had to file out the flanges to prevent it chaffing on the fuse skin. I dont have a photo but can take one if it would help.


It took a day and was quite fiddly getting everything lined up but I got the empenage installed.

Lining up the elevator and rudder rod ends and installing the bolts is hell fiddly too. I dont think there is an easy way. The camlock instal tool is hand for putting over the bolts and squeezing them into the bracket / rod end  hinge points.


TO DO : The two forward facing bolts and an extra hole / bolt need to be installed / torqued.  Gonna do it at the same time as I fit the pitot static. Chains for the tailwheel steering.

The fuselage gets narrower every time I crawl in. Hopefully this will be the last.

sb06-9-20.pdf               Trim Cable Anchor   Service Bulletin
 
WD-415-1              TRIM CABLE ANCHOR            $8.60
 
   Bugger ! This is a PIA - I just got done installing the elevator and would rather not mess with it. If, however, that were to snap off it could lead to a fatal loss of control. It really should be retro fit.To make matters more complicated the trim cable is too short by about a half inch at the quadrant. The turn into the HS end rib is quite sharp. If slack were found in the cable it would mean securing the quadrant end to the forward not the aft section of the spar carry through bulkhead - nasty fiddly stuff.

The elevator control stop setup is shown in DWG 30 and the limits are 30 up / down.

Brakes


Ordered : RV-4 BRAKE CONVERSION PLASTIC TO ALUM CONV. 

Plumbed from the brakes to the master cylinders. Now need the elbows to go on the low pressure side.

Now to figger out how to bleed the system.

Prop / Spinner

Got the prop and spinner mounted this week end quite a fiddly time consuming job. Lots of cut and try.


A big cheerio to Mick Muller over in Sheparton and Jodie for helping me out with this prop. Drinks on me guys !!

Invincible Airscrews Pty. Ltd.,
(David Green & Ken Adams)
See note P.O.Box 62,
Mortdale, N.S.W. 2223,
Australia
Tel/Fax : +61 2 9153 0764
Fax or mail communications are preferred


Markings:
Lycoming O - 320
DRG NO 30 - D - 68
D   5.75' P 5.75'
NO I A 8343
NOV 1998

The spinner is a sod to paint as it seems to perfect shape and size for sags and runs. Best to lay it on it's side and do it in a couple of stages.

Canopy REDUX

Since I busted my canopy.

I got  Todd's Canopies to build me a new canopy which set me back $360 USD. It looks great !! I asked him to build it a little taller so as I had a bit of head room. The old one I was hitting my head when sitting tall.


Todd Silver is a delightful bloke to deal with. Very enthusiastic and helpful.

The next challenge will be determining how much of the old canopy frame will be usable and how to fair off the rear end. I have seen them done by squaring off the skin rear of the canopy from bow leaving an inch or so of overlap and simply weather sealing a aluminum strip over the perspex to the aft of that to the top of the fuselage. Much as guy do with the wing root fairing


Sika 295 UV.


Leaking Fuel Tank

I filled up the fuel tanks with water to leak test them. One of them leaked through the back of the fuel quantity sender. No problem I will replace them both - they have been lying around a while. The other leaked out of the outboard rear baffle seal with the rib. Nasty.

There is a thread on Van's Airforce - http://www.vansairforce.com/community/showthread.php?t=95262&highlight=leak&page=2 dealing with prophylaxis - rather fiddly and more likely to cause problems IMHO.

However it does have some input from pros and alludes to industry practice. There are products that do this task and apparently an A and  B class sealant. B is a top coat apparently. The Tech specs are here and time to do some research I guess.  http://www.ppg.com/coatings/aerospace/sealants/sealantsproducts/Pages/FuelTank_StdTech.aspx

Wednesday, November 14, 2012

Operational Equipment

Flight Planning 

AvPlan


ELB


GME MT410G


The PLB needs to be registered online with AMSA. I will probably get a Sat Phone as well for, back up once, I get into serious travel. Hang on .. dont I already do that for my day job ?

Got my Medical and applied for my ASIC last week. It's all coming together slowly.

Radio / Electrics

I got all the major wiring done and will spin it up this afternoon.

I fitted the battery using adhesive neoprene (stuck to the battery) inside a cover.

The next purchase will be the radio and my Tax Cheque is burning a hole in my pocket.

Monday, November 12, 2012

Fairings

Empenage. I bought a new one for the empenage - "RV -4 Fairing Subkit".  The fairing i bought from Van's wont fit.. The Horizontal Stab line is about 3/4 " too high meaning it wont line up. Essentially it is designed for a larger diameter than the  RV - 4. To trim it would mean the HS trim  flanges would meet up about 5 inches aft the trailing edge. The top fairing for the rudder  / Horizontal stabilizer has F - 868 marked  up on it and is nowhere close to fitting on the RV - 4. Is it possible Vans accidentally sent me the empenage fairing for an RV - 8 ?  Even if they did I would expect the two to be more or less congruent.


The fairing subkit comes with all the fairings except the gear legs. The glass work is miles better than the original kit.


Gear Leg Fairings :


I bought some epoxy from :


Fibreglass and resin supplies
Charlie Irwin
111 kew St
Welshpool


08 9361 8316


Charlie sat me down and told me how to use the epoxy emphasizing temperature above 15C and  to get the ratios as accurate as possible. The analogy he uses is nuts and bolts a surplus of one leads to unwed units of the other.


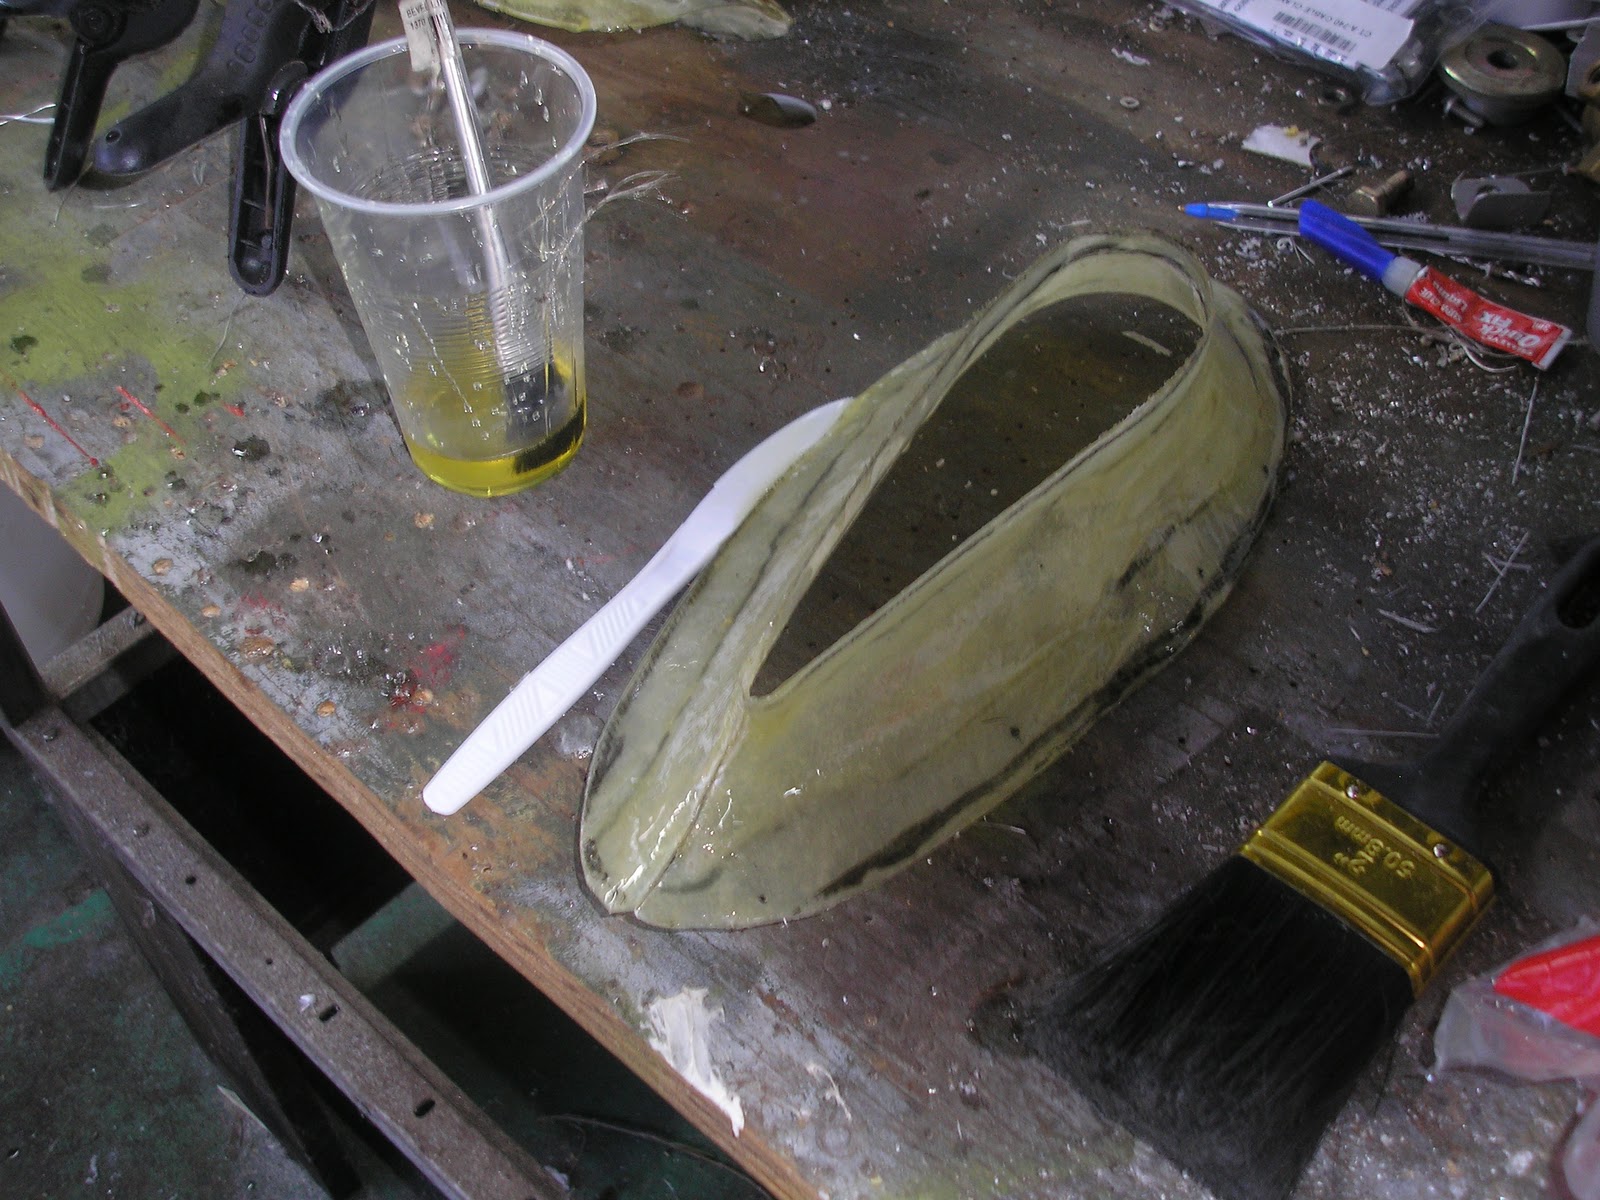
I taped and Plasticined the contours on the cowl to gear leg fairings. This is prior to sculpting with a half moon shaped plastic card. Still pretty bumpy.


UPDATE: I completed the glass work on the fairings this weekend.   What remains to be done is to use a filler on the fairings to make the surface smooth. I will do this at the same time as I glass the air scoop onto the bottom of the cowls. The only nasty thing about the job was removing the wretched aluminum tape  from the components - it sticks like crazy and fragments when you go to peel it off. I busted a fingernail on the job.

 It proved to be quite easy except that the aluminium tape is a mongrel to get off - a real nail buster. Fairings half done - need to get countersunk washers and fixings for the upper fairings - these will probably be blind - maybe a job for rivnuts? Also need to use body filler for the aesthetic smoothness.


Conclusion.


This job is time consuming and messy. Now I would DEFINITELY buy them and save the time. I am however satisfied that I learned a bit about glassing. I would hate to have launched into glassing on the new airscoop with out doing this job as a primer. Now I am fairly confident I will get a satisfactory job done and not risk having to order a new cowl by stuffing the job up.


I would hate to build a whole airplane out of the stuff.

Persevered with the wretched things  with lots of sandpaper and sitting round on the front porch. 

They don't look to flash but neither Kayt nor I could be arsed with them any more. 


Cockpit and Instrument Panel


I have decided to move the fuel tap - it is easier to get at there and there is more room to do the plumbing. I have mounted a lockout similar to that used in mining equipment. the master electrical isolator is right underneath it. More in the details in the electrics section.

I biffed off the intercom since the ICOM A 210 Radio has one. In it's place I put on the V/G Meter  - wouldnt you know it I got the holes in slightly the wrong spot. There's 20 minutes with the needle files.


To Do :

Mount Hot air Control

Mount Cold air Control


Sunday, October 28, 2012

Engine O-320-E2D

O-320-E2D

150 hp (112 kW) at 2700 rpm, Minimum fuel grade 80/87 avgas, compression ratio 7.00:1. Similar to E2A but with Slick disposable magnetos and 0-235 front. Used in the Cessna 172 I to M models.

General characteristics


  • Type: Four-cylinder air-cooled
  • Bore: 5.125 in (130.18 mm)
  • Stroke: 3.875 in (98.43 mm)
  • Displacement: 319.8 cu in (5.24 l)
  • Dry weight: 244 lb (111 kg)


  • ?? Bolts holding the FAB to the carby are nylocks should they be castellated and wired ?? YES.
http://www.sacskyranch.com/lycoming.htm


  • ?? diaphragm seat ring has an overflow fitting of some kind. Is this plugged?
  • ?? Locate and remove oil in / out plugs from motor to cooler.??
  • ?? What does the knurled screw above mixture bellcrank do??
  • ?? Crankcase Breather ?  Just a pipe overboard or a air oil separator?

Saturday, June 23, 2012

Decal Themes

Themes to consider in decal design.


Here are some preliminary sketches Brett has come up with - Cool Huh ?


Friday, June 22, 2012

Pilot's Licence and C of A


Reserve a mark - I wasn't going to do this but rather take what came off the stack and save myself 65 bucks.  But Kayt spotted VH - LAG and I just had to have it !!

Rego - 130 bucks right there .

Exemption or rather "Assesment of Noise" - online form that took some finding. No Charge.

I have my C of A pack from the SAAA and will take it to work next week and check it out,

Got my ARN Self Serve 416307 sorted.

You must print out the docs and sign them and scan them and include a scan of your passport or birth cerificate.  

I also started on the ASIC. That shouldnt be too gruesome - just a matter of getting some pasport snaps. I will get the Medico to certify the ID when I sit my Medical .